Introduction
Prior to the summer 2017 I was known for hosting services for just about anything friends had a minor
interest for (lots of minecraft servers). Due to major life changes, I sold most of my hardware and left
what ever remaining servers powerd off in storage. During christmas of 2019, I had taken 2-weeks off of
work and for the first time in months I had free time to myself. I finally decided to pull out my NAS
server I assembled back in 2013.
Specs (2013)
| Part |
Description |
| Case |
Fractal Design Define R4 |
| Processor |
Intel Xeon E3-1230 V2 @ 3.3GHz (3.7GHz turbo) |
| RAM |
16 GB ECC Unbuffered DDR3 1600 |
| Motherboard |
SUPERMICRO X9SCL-F |
| LAN |
Dual Intel Gigabit |
| Controller |
IBM M1015 |
| PSU |
SeaSonic 360W, Gold Certified |
| Disk |
4 x 3TB WD Caviar Green |
| OS |
FreeNAS |
| UPS |
APC Pro 1500 |
When booting up the server I noticed I had roughly 60% of my storage used, and if I was going to embark on
some of my new projects, I was going to need to add more storage space. The present case I had only fit 6
drives, and my power supply only had 4 Sata Power connectors (I probably could have gotten 2 splitters at most
if the rail supported it). So with 4 drives already installed I started browsing the internet for better solutions.
That’s when I cam across an endless amount of blogs/reddit posts of people building their own JBOD enclosures using
an HP SAS Expander. It is highly recomended you don’t use these on SATA drives if you care about your data, but the
drives I would be connection are non crytical. Thus began my 12 bay hard drive expansion case.
Buying & Assembing the JBOD Case
A few of the parts I already had sitting around. First off I already had a M105 raid card, case with 9 x 5.25-inch drives,
a GPU riser and an leftover power supply with 8 Molex ports. So I ordered the remaing parts I thought I would need for the
build.

| Part |
Description |
Price |
| SFF-8088 to SFF-8087 Adapter PCI Card Bracket |
Allows my M1015 to connect to a standardized SFF-8087 wire |
$39.99 |
| 3 x SAS to SATA breakout cable |
Allows me to connect up to 4 SATA drives, per cable, to my SAS Expander |
$19.97 |
| 3 x Rosewill 4 x 3.5-Inch Hot-swap Sata Disk Drive Cage |
Allows hard drive to be easily hot swapped from the front of the case |
$194.97 |
| External SFF-8088 to SFF-8088 Male to Male cable |
Allows me to connect my JBOD case to my NAS like any other industry JBOD case |
$18.55 |
| Power Supply Jumper |
Allows the power supply to stay powered on at all times |
$9.99 |
| HP SAS Expander Card |
Allows me to connect up to 32 SATA/SAS drives to a single SAS port |
$39.99 |
Assembly
The SAS expander was on its way from China, and arrived last. So while waiting for the final part, I assembled the majority of the case.
The biggest issues I stumbled across was getting a good connection on the SATA connectors for the Rosewill hard drives cages. Because
each SATA cable was so close to each other, it was a real struggle getting them to “click” into position. Reading the documentation
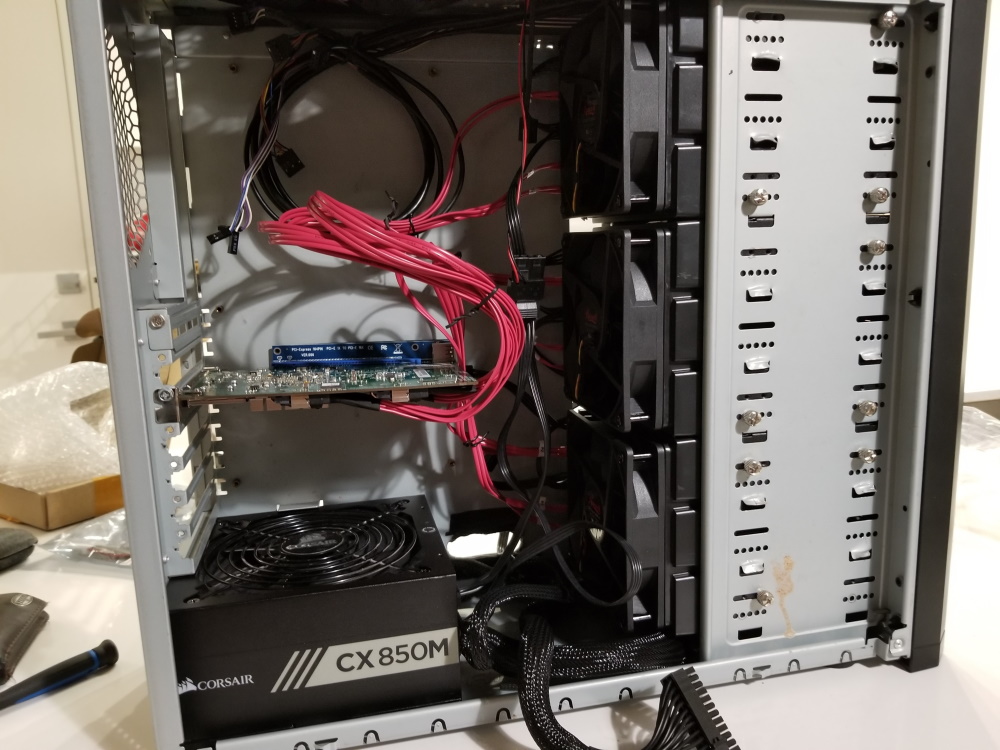
for the HP SAS expander I ensure the correct internal SAS ports were connected. Finally I had decided to use a GPU riser, typically
used for crypto mining, as a source of power for the expander. The interior of the case ended up looking something like this:

Plug and Pray
With the case assembled all that was left was to plug it into my NAS and see if it could detect hard drives I added to the Rosewill cadies.
Since this is a DIY solution, the only way to really power on/off the JBOD case was via the PSU’s power switch. So after powering on my JBOD
case, followed by my NAS I popped in a test drive. The LED turned blue, and FreeNAS had instantly detected the newly connected drive.
To my suprise the JBOD case worked without any issue. I was worried that I would have to do a firmware upgrade on the HP SAS expander to allow
it to detect drives larger than 2TB, but it seemed to have already had a new enough firmware installed. The picture bellow demonstrates how simple
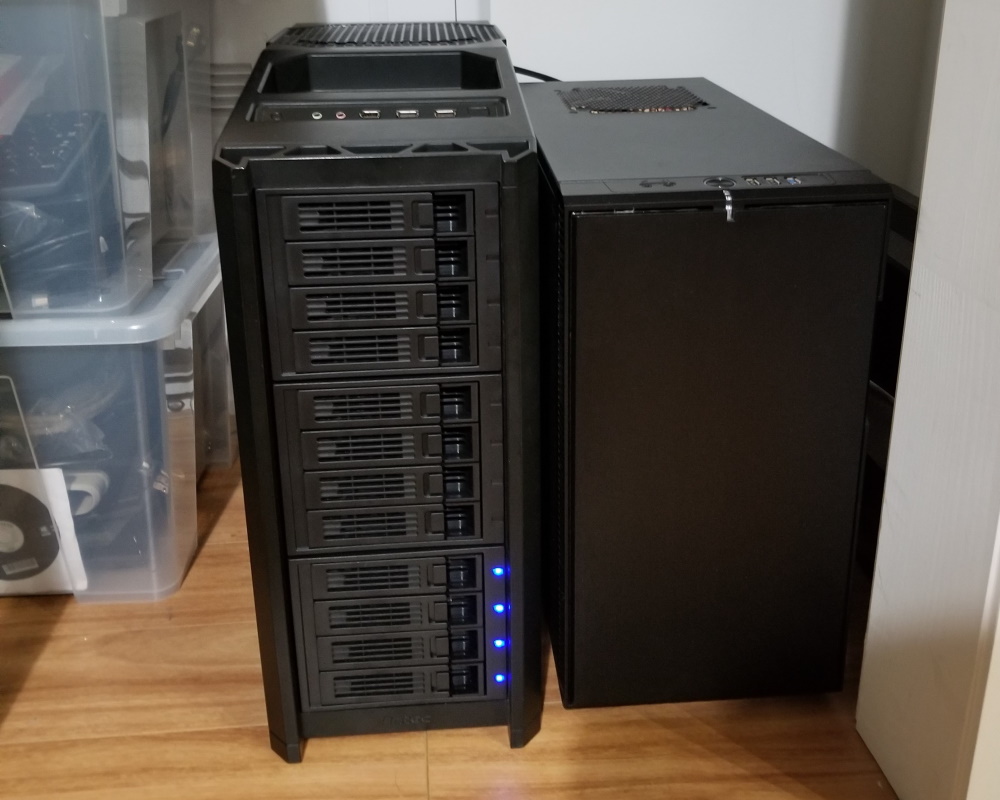
connecting the JBOD to the NAS is (2 wires, power and SAS).

Conclusion
Overall for the price of ~$300 I am happy the way this build turned out. Although I could of purchased a second hand disk shelf online for slightly
cheaper, the noise level and footprint could not be beat. At the time that I built this JBOD enclosure, I needed to store this in a closet with
little floor space. With the disk shelf working with my stack of old retired drives, I decided to purchase 6 x 8TB drives along with 16GB of extra
ram for my NAS. Giving me a total raw storage capacity of 60TB.